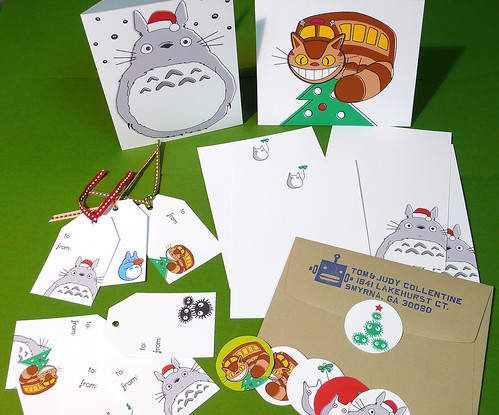
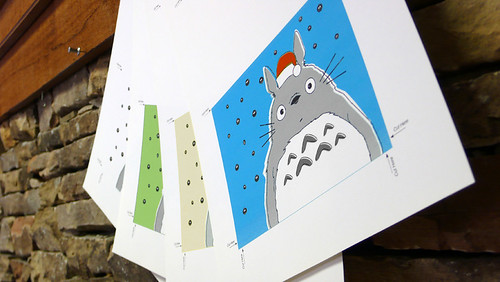
Man oh man. At a certain point we had to say, "Okay stop. There's a billion things in here!" 39 to be exact. 6 PDF pages full of Totoro Goodness® . We could have gone on forever. There's so much fun stuff in the Totoro universe, it's easy to get carried away. But we wanted to get the holiday set listed before the holidays were over. Shocking concept there, eh?
The character designs are all from Miyazaki, but each illustration is original by Mona.
My favorite is the Soot Sprite Christmas Tree.
Includes:
2 Folded gift cards:
• 1 Santa Totoro
• 1 Catbus
4 Flat notecards:
• 2 Santa Totoro
• 2 Sho Totoro
9 Gift tags:
• 3 Santa Totoro
• 2 Catbus
• 2 Sho Totoro
• 1 Soot Sprites
• 1 Blue Totoro with Ocarina
24 1.5" Envelope Stickers:
• 8 Santa Totoro
• 4 Red Sho Totoro
• 2 White Sho Totoro
• 4 Green Catbus
• 4 White Catbus
• 2 Soot Sprite Christmas Tree
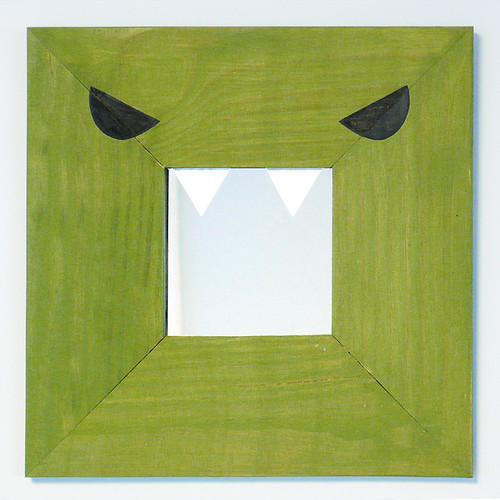
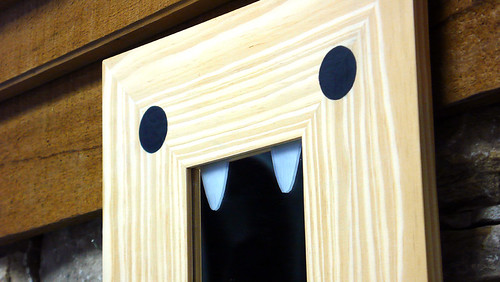
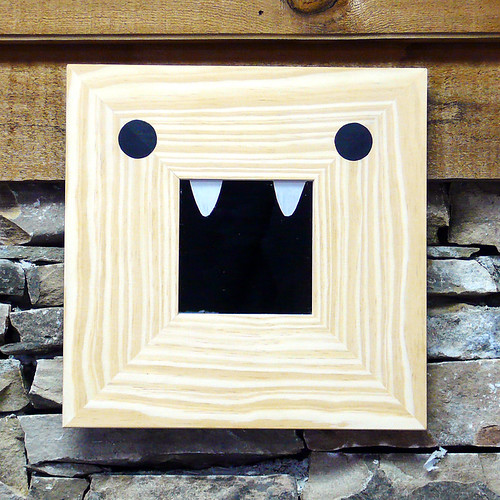
Another upcycled/altered mirror. We stained this guy green so you can still see the wood grain. Etched some pointy fangs, and painted on some furrowed eyeballs. Poof! Rar!
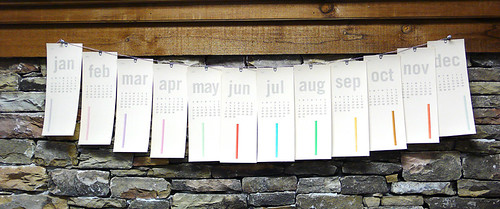
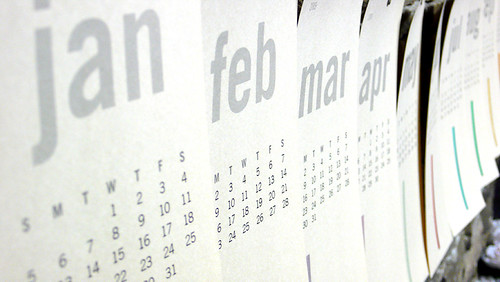
Just finished posting my minimalist design calendar for 2009 as a printable PDF template. Once you purchase the listing, we email you the PDF file, and you can print out as many as you like. I set them up so that two months are on a single letter-sized page, so you just have to print on cardstock and cut them in half. Give them as gifts, or keep for yourself, or both. Print out on a nice textured cardstock, punch a hole in each one and tie with a ribbon and you've got sweet presents for like, wicked cheap.
Design-wise, each month has a corresponding color stripe that themes with that month's season, and each month the stripe moves one slot to the right. So January is far left, and December is far right.
I hope you like them, I certainly had fun designing them.
My good friend Mike just pointed out the "Follower" tool on blogspot, so now you can have our updates sent right to your blogger dashboard! Just click on "follow this blog" in the righthand column.
Earlier today I was envying Jenn Ski's alphabet prints, and given my long-standing obsession with manatees, Nathan thought "You should do something like that, only every letter has to do with manatees instead of different animals." So, naturally, I was saying 'bananatee!!' all afternoon.
Tonight I tried to practice bringing my Illlustrator drawings into Photoshop to give them texture. Seems like just about everyone and their mother already does this, usually with great results, so I'm a little tardy to the party, but what the hey..
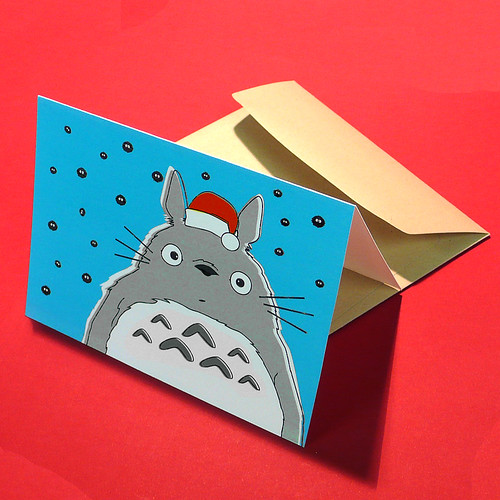
We've been on a Totoro kick lately, and the latest installment is this set of 4 printable Totoro holiday cards. They're up in our Etsy shop. Once you purchase the PDF, you can print as many as you like! Keep them for yourself, or give out to friends, or print up a set of 10 for a great gift. There are four different colors included, so you can mix and match. Each card template even has lots of helpful tips for the DIYer, like, "CUT HERE" and "FOLD HERE." And just a tip, folding works best if you either crease or score the fold line a bit. Makes for a much cleaner fold.
They measure 5.5 x 4" and should fit most medium envelopes (not included).
I'm finishing up some linocut prints of the same illustration. Except these are limited edition, hand-carved and hand-printed cards. I only have the hats to print and then I'll post pics. I really like how they came out, the ink has a mind of its own. Pretty much the opposite of computer-drawn work. Except it started on the computer. Which makes me like it even more. I'm big on that whole computer/handmade/mush-em-all-together thing, if you haven't noticed.
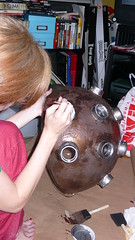
Last night Mona finished working on our first Mirror Monster . We got some small blank mirrors from the IKEA place, and Mona etched some fangs into the glass, and then hand painted some eyes (with only a little touchup help from me). They look black but they're actually Paynes Gray, which is more interesting and better than black. Mona's quite proud of her creation.
I like how such small, subtle details can completely change the character of an object. What is ostensibly a pair of triangles and circles, now becomes a cute and super-fierce monster face rar.
We debated back and forth about whether or not we should stain him. Mona really liked the bare-wood naked look, and so do I, but I also wanted to try staining him with this transparent green stain we have. Then we remembered we have like four of these mirrors, so the next one will be green.
To finish up, I stamped the back with our Etsy store address and a little fly stamp I carved. The mirror has some screw-hooks for hanging, but we decided to not install them and let the new owner decide how to display him.
I finally decided to try carving my very own stamp last night. Since Nathan keeps churning out awesome stamp after awesome stamp, how hard could it be? Turns out, it's kind of a pain in the ass at first, but so worth it once you get the hang of it.
As an illustrator who works almost exclusively on the computer, whether using the dreaded pen tool in Adobe Illustrator or drawing on my Wacom tablet in Corel Painter, kickin' it old school and actually making something by hand was a challenge for me. You see, linocutters do not have an "undo" command. So when you carve a chunk out of your line art on a stamp, it stays carved. Ugh! This means I had to work slower and more patiently than usual. Nathan was a big help and showed me some techniques like... carving in narrow, shallow strokes instead of deep gouging ruts (maybe I need a better outlet for my pent-up energy?) Also, in the real world, there's no "zoom" tool. Some of the details are so tiny, I felt like my eyes were going to cross and stay that way.
Gripes aside, working with physical tools and materials that don't always behave how you want them to was actually kind of theraputic for me, like putting Elmer's glue on your hands and slowly peeling it off.
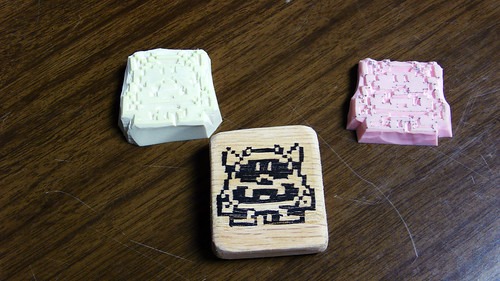
Nate and I both worked on the same stamp design (a little Totoro) so I could compare my shaky job with his rockin' one. It was hard work, but once I saw my finished stamp, it made me want to make more.
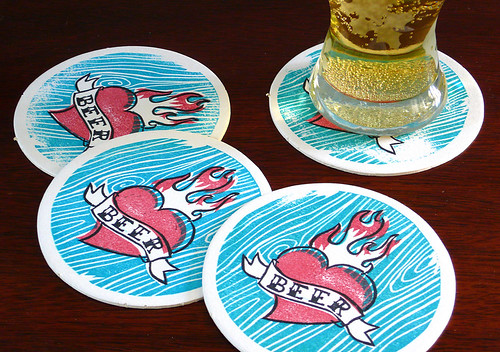
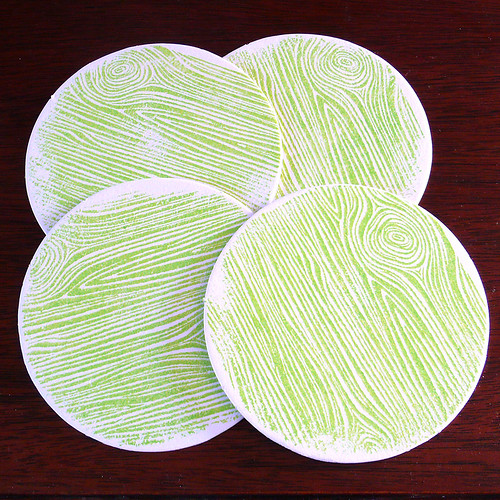
Just finished up our first sets of coasters: Sacred Beer and Chartreuse Woodgrain. The top image is Mona's original illustration of a sacred beer tattoo that I carved for a three-color print. So that's three separate stamps, which then had to be registered by eye for printing. Of course she had to hand draw anold-timey seriffed font [edit: I thought it was a real font, but Mona just scolded me and told me she drew the text by hand, so I'm editing], which is not exactly easy to carve, but it came out better than I expected. I tweaked the design to allow for things to not have to line up perfectly, and I love how they came out. You can see more pics in my Flickr set. (If you look closely, you can see the etched leaves glass)
We're trying to think of more "useful" items for the shop, rather than just "luxury" collectibles. So into the housewares venue we go. I'm working on some wall paintings of illustrations of mine. I'll post them when I get them finished. I'm painting in oils for the first time, I've never really had the space or ventilation before in our shoebox of a NYC apartment, but now that I do: mmm, colors.
Also in the pipe are some ACEOs of a holiday Totoro from Mona's illustration. I think it's pretty freaking sweet and can't wait to finish it. I wanted to make some prints larger than the typical rubber stamp can handle, and since we aren't in our own house yet and don't have the space for silkscreening, I though linocut prints would be the next logical step. Ouch. Whole different animal. I did a small test on a 2x2 lino block of soot sprites, and so far the results aren't quite what I expected. I think I need to measure my ink distribution and adjust the depth of my detail cuts. I'll keep at it though and post more when I've gotten a bit further along.
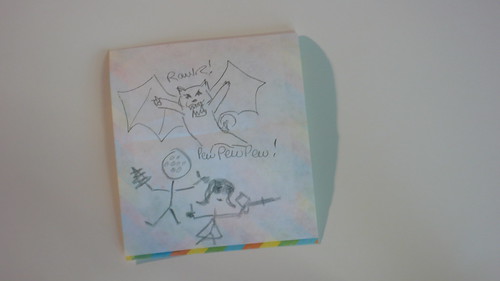
I'm trying to get back into the habit of drawing outside of work, so I decided to make a few illustrations inspired by one of my favorite movies, My Neighbor Totoro by Hayao Miyazaki. I also might have gotten a little distracted from drawing by all the cute Totoro merchandise for sale on the web.
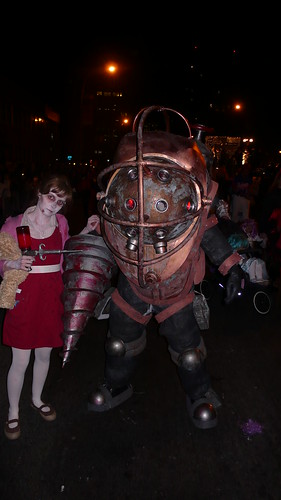
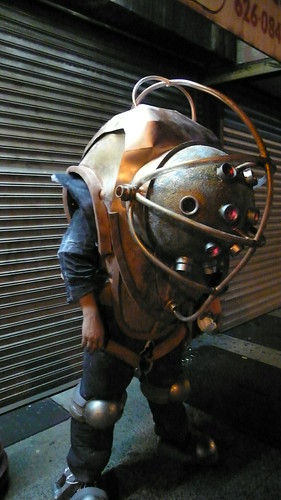
Thought I would post a few links and relate the story from last year when we made that sweet-ass Bioshock Big Daddy costume. Bioshock, for those who may not know, is a first-person video game that was originally released for the Xbox360, but has been rereleased on the PS3. Set in an underwater utopian city gone horribly wrong called Rapture. The environments are beautiful art-deco inspired vistas, and the story with its themes on personal responsibility and morality is one of the best I've experienced in interactive entertainment.
One of the main icons of the game are the characters of Big Daddy and Little sister. Mona and I loved playing that game. Mona had been known to create a sweetcostume or two , so come Halloween costume time, Mona thought, wouldn't it be sweet if we could go as Big Daddy and Little Sister? Oh yes. It would. And it would also be a tremendous undertaking.
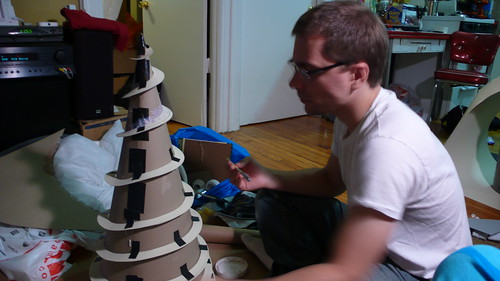
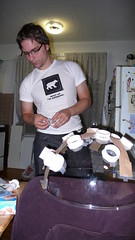
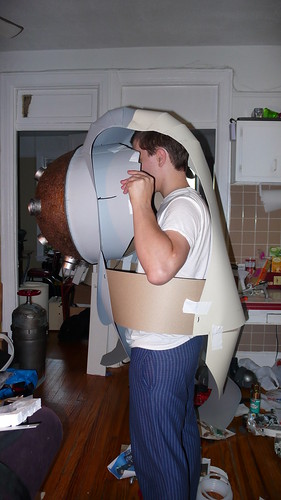
We had no idea where to start. We looked online for costumes, but found that no one at that point had really made anything beyond the cardboard and aluminum foil mockups. I wasn't going to settle for a half-assed costume. If I was going to do it, then I was going all out, and make one better than anything out there. In my early years (cause I'm oh so old now), I was very interested in special effects and horror makeup, and mildly obsessed with classic ILM and considered making a career out of it. I had experience sculpting little stop-motion puppets and the like (I majored in stop-motion in my short Pratt Institute career), and with both Mona and me as artists and designers, I knew we could do this. I took it as a personal challenge to make the best damn Big Daddy I possibly could.
So during those three months, I documented the construction process on my Flickr site.
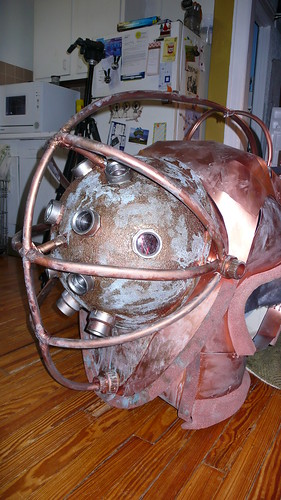
We had started in August, with no idea of how or from what to construct this thing. Three months of trial and error and about $500 later, I was painting on patina as I called a cab to take me to the parade lineup. Getting there wasn't fun either. Mona was working (being a weekday) and so it was just me transporting the huge suit. I was going to have to cab drop me off near Mona's office, which was 21st street and 5th Ave, a block from the parade route on 6th Ave (but, about 12 blocks or so from the actual parade start).
I barely fit the thing into a Lincoln Continental, traffic was crazy, and once on 5th Ave, we couldn't get back to Mona's office because of police barricades. Which would have been fine, but Mona had come down to meet me to help me move the suit, and had left half her Little Sister costume upstairs. Eventually she convinced the cop to let her go back (she had just walked out from the barricade past the guy a few minutes earlier.
Eventually, with much effort fighting through crowds we made it to the lineup. At this point, I had purchased some bulk industrial red glow sticks, and we proceeded to spend a good 20 minutes cracking, cutting open, and pouring the glowing goo into Mona's Little Sister ADAM syringe. It looked sweet, though I'm surprised I didn't lose a finger. You're not exactly supposed to cut open glowsticks, and they certainly don't make it easy to do so.
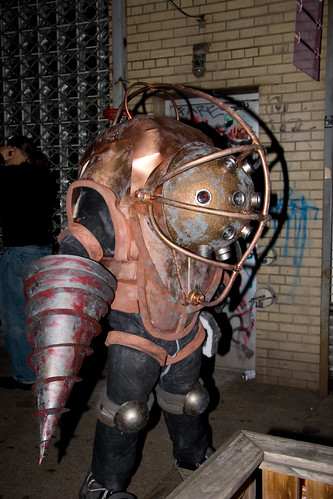
So, the parade was starting, I suited up and realized I couldn't see a thing. The portholes I was using for visibility were practically useless. In the cool night air, with the heat from the dome lights and me all breathing and stuff, condensation built up to the point that I had zero visibility. Not even like, some; a little; a tiny bit: none. Yay design flaw. Live and learn. Thanks to rob5408 for taking the below pic at the lineup.
This was my prototype suit. I ended up replacing the black paper painter's suit with a sweet, stretchy, XXLarge old man grampa jumpsuit . Jumpsuits rule. After another couple hours of shuffling along completely blind in the huge mass of smushed people that is the parade lineup with only Mona and our friend Daniel to guide me we finally got to the actual parade. I drilled many people. Unintentionally, of course. That's my story and I'm sticking to it. I'm told the parade was fun, with lots of neat costumes. At one point Mona and I were walking by a float playing Prince, so we started dancing.
But all I could think about was, dear god, kill me now. End it. Big old lightning bolt. Bzt. Kthxbai.
By the time we got to the actual parade, I'd already spend two hours or so in the suit, sweating profusely (attractive eh?) thanks to the cotton batting I used to bulk up the non-breathable painter's suit. Thankfully, my parents own a campground and at one point had a big beaver (get your mind out of the gutter, perv) as a mascot for going on hayrides with kids and the like, and had an ice vest that is made for cooling down people in stuffy suits. I had them dig it out of storage and mail it to me in advance. Thank god for that. I'm sure I would have passed out otherwise.
In tests during construction, I hadn't worn the suit longer than a few minutes at a time, and it was perfectly comfortable. After three hours of getting knocked around by careless or drunk paraders and an intense dehydration headache, it was less so. All the weight was placed on shoulder straps, but the weight of the suit ended up making the vinyl settle a bit, so my head and neck also took a lot of the weight. Next time, a waist strap belt to take the bulk of the suit weight.
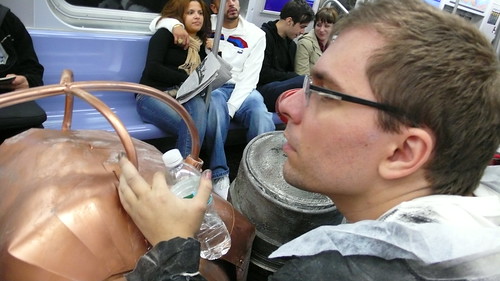
After 20 blocks or so, I had to bail out. Walking to the train and riding the subway home was also fun.
A shopkeeper in Astoria really like my astronaut costume. After a couple days, things started happening in the internets.
My friend and her boyfriend, known for great game-themed costumes, created Big Daddy/Little Sister costumes that easily trump any others I've seen. The hand-made Big Daddy lights up from inside its dome, and Little Sister even has ADAM! Click to go back to the gallery page for a lot more photos.
Which led to someone submitting our pic to CollegeHumor.com'sHalloween costume contest claiming to be us. CH found us on Flickr and contacted us to see if we were the ones who entered or not. They corrected the submission info and we ended up getting second place (behind bender no less).
The CH staffer who contacted me was Jeff Rubin, who also does interviews and videos for the site. He asked if he could interview me about the costume, so he and some other CH staffers trekked to Astoria and there you go :
From there, things got quiet. For a while. Until I got this email:
Hey there,
I’m Community Manager at 2K Games, and I’m tracking you down because of your amazing Big Daddy costume. Two questions: First, do you still have the costume, and second, are you available around the dates of December 6th through 8th?
Thanks!
-Elizabeth
Next time, I'll write about the insanity that was Las Vegas and the Video Game Awards. Until then, here's a little sneak peak :
I even went so far as to (attempt to) record a video tutorial on carving 8-bit rubber stamps. Here's a little taste of the awesome that goes on over here in Cupcakeland.
I blogged a while ago about my packaging design for Hanky Panky (lingerie company) being featured on Swedish Elle's website. Out of curiosity, I looked up "hanky panky" on amazon.com to see if the item (a trio of thongs inside a vintage-style hat box) was for sale there. And I found it! :-) For some reason, only the purple hat box is available. There is also a lime green version somewhere out there. I have yet to see the product in a real-life store yet, but they should be out in time for holiday shopping. Buy it through this link if you're interested, it's hooked in to our Amazon Associates ID (Amazon pays us. Yay!). Hanky Panky Thong Trio with Vintage Hat Box Panty
The above photo doesn't show that the packaging has silver hot stamping (foil) on it. Not much of a thong girl myself, I had never heard of Hanky Panky before our first meeting. Normally, the company I work for makes mostly handmade greeting cards, coordinating gift bags and other paper items such as magnet list pads, journals, tissue paper (the gift-wrapping kind, not the rump-wiping kind). But a friend of my bosses (I work for a small family-owned company) was hired by Hanky Panky, and he recommended us for packaging their upcoming seasonal items.
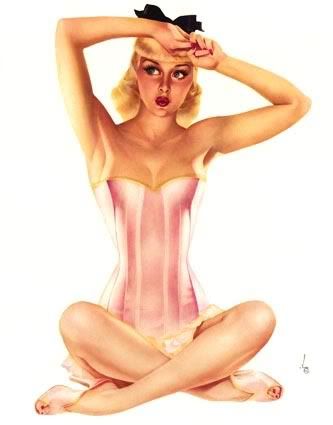
At our first meeting, Hanky Panky brought in some reference photos of bombshells like Rita Hayworth, Veronica Lake and some classic Varga girl pin-ups. I was secretly delighted, because for a long time, all I drew was pin-ups. I've always had a love of vintage stuff: vintage cars, vintage design, vintage clothes, so I had a good idea of what they were looking for style-wise: a mix between art deco and classic Hollywood. Hanky Panky was quite insistent about using the colors purple and green, purple for their original style thong, and green for the low-rise version.
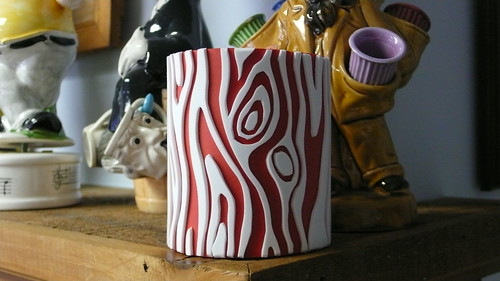
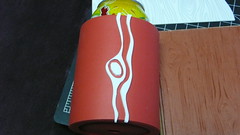
Just finished posting a newly made fancy-pants foam cozy. That now brings the total to two hand-appliqued cozies listed. Now, some may not like the idea of foam in the political-correctness area. I say pft. Show me a crocheted cozy that can actually keep my can cold, and I'll get some needles.
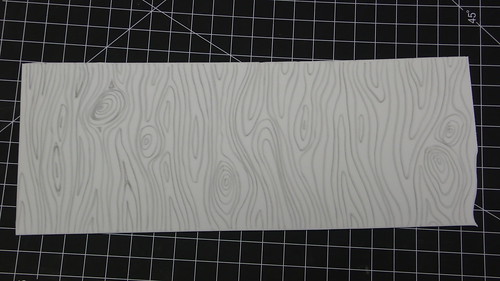
Started by drawing some wood grain:
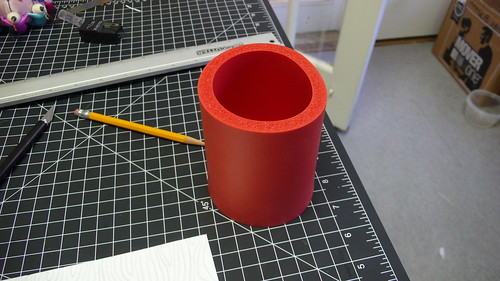
Got a blank red cozy:
And applique away:
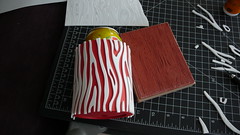
As an aside, this project was made on top of my sadly neglected Vox AC-30. Which is now pretty much a table with 4" casters. Le sigh.
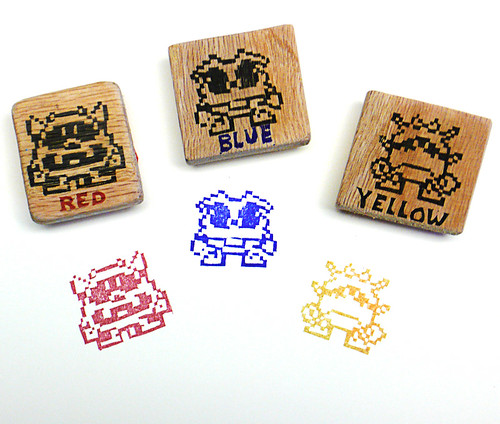
Just finished carving a couple Red Virus stamps. They were much less a pain in the butt than I was expecting. I thought the square-edged pixels were going to be a nightmare. The trick is using an Xacto knife and not lino cutters. Tomorrow I'll work on Blue and Yellow.
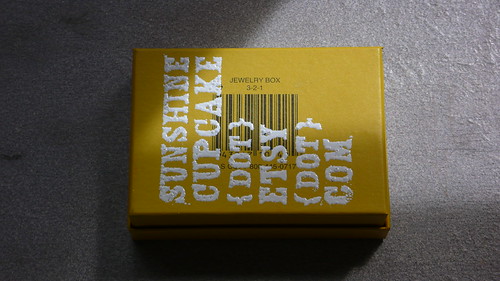
I've been scouring the internets to find good places to get packaging supplies and materials. I've tried Pearl Paint and Michael's locally, but they really didn't have what we were looking for. Michael's had a few jewelry boxes that we picked up to use meantime, but they end up having barcodes on them:
Which isn't all that aesthetically pleasing.
So here is a list of what I've found so far that seems useful, I'll update this post as I find more, and if you've had any experience (good or bad) with any of these companies, please comment:
Paperworks.com - pretty much a paper site, but they seem to have a nice variety of coated, photo, and specialty papers and envelopes. There's also a section to order samples, which might be all you need for a backer, header or insert.
Papermart.com - I just found this one and it seems like there's a ton of useful items here. All sorts of gift boxes and specialty boxes, including non-square shapes, tins(!), shred, and cello bags. Pretty much anything you can think of in the packaging department, they have. Including mops. For cleaning up, um, packaging disasters. SPLODE!
Uline.com - The old standard for bulk cheap boxes, though they seem to cater more toward larger boxes for moving and the like. There are some smaller boxes though. And they have a nice amount of poly bag supplies, including sealers for custom-size bags.
Royalmailers.com - standard bubble and flat rigid mailers (good for photos or prints, which I'll probably pick up for shipping my prints), seems more catered to flat and document mailing, though they have boxes as well.
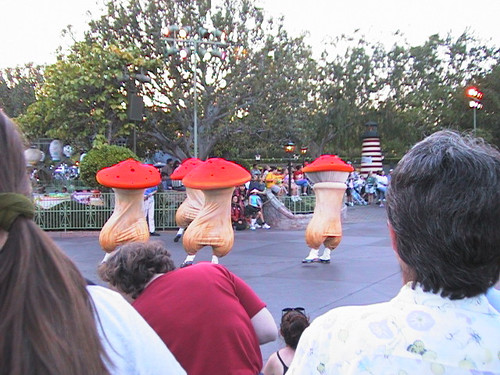
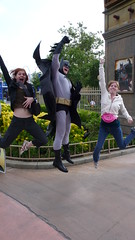
I was browsing through flickr trying to find old Epcot pictures (specifically of Figment and the Imagination Pavilion) and came across the photostream of a fellow Disney nerd. I couldn't stop giggling at this photo..
Okay. So I thought I was all super clever when I purchased my first digital camera.
I had used pro digital SLRs, but they were always owned by the company I was working for. Borrowing the camera for personal projects was never a problem, so I had no need to buy one myself. Now that I'm not working as a commercial photographer, last year I thought it about time to get myself a little something something. SLRs are great, but bulky, so I decided on a point-and-shoot which I could take with me on outings and trips and the like. But of course, I couldn't get just any P&S, I had to get a super-fancy one.
Here's the clever part. Leica create—in my opinion and many others—the greatest cameras. Period. I've wanted one for, ever. So when I was looking into Leica P&S cameras, I learned that Panasonic makes their digital cameras, using Leica components. So looking at the Leica D-LUX 3, you find the Lumix DMC-LX2.
The Lumix DMC-LX2 to the left (the pic is silver, but my camera is black), the Leica D-LUX 3 to the right. They're the samecamera. Except the Lumix is about $300 cheaper. And has a little grippy thing. Otherwise it has the exact same components. Same high-end Leica lens, same CCD, same image processing. Did I mention they're the same? And the Lumix is way cheaper? Not even like, similar. MADE BY THE SAME COMPANY(s).
That's enough of that. For a P&S, it's amazing. Awesome lens. Optical image stabilization (meaning the lens floats a bit and corrects for camera shake to an extent). Manual focus. RAW files. Widescreen CCD (not just a cropped square CCD). 10MP. The list goes on and on.
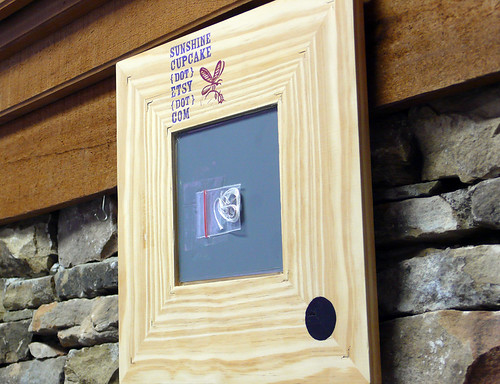
Now, for the not so happy things. It doesn't do well in low light (the next model up, released after I bought mine, is supposed to fix this and everything else I have quips with). It tends to add noise and look "processed." So effectively I only use it at ISO100. This is mostly due to 10MP CCD on a P&S. More pixels is not necessarily better. In fact, smushing more pixels into a small CCD means less quality per pixel, overall. So, zooming in to 100% of an image can often reveal limitations. At typical viewing and printing size, none of this is an issue, because the image is resized down and you don't see the imperfections. BUT: when shooting product shots, like I do for Sunshine Cupcake, I get issues.
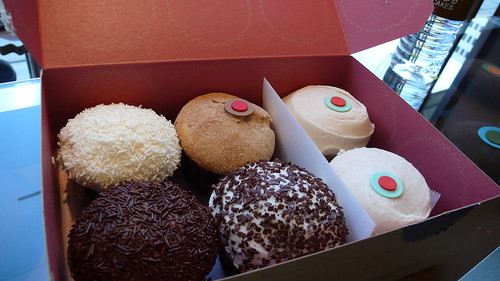
P&S macro is hit and miss. They tend to have a longer minimum focal distance. Meaning, the camera and lens need to be further away from the subject before it can focus clearly than an SLR with a larger lens needs to be. So getting up close and personal with little clay dudes or buttons 1" tall means I have to set up my tripod (no problem), zoom in to the maximum optical zoom of 4x, and then still be over a foot away from the product. So I end up getting a little bitty button in the middle of a huge frame. Case in point:
Which when cropped, becomes this:
This does not a happy Nathan make. It's okay, and shows the product, and is better than nothing. But I will enjoy the day when we sell enough to warrant the purchase of a good ol' SLR, and keep my LX2 on my hip, where it belongs.


